Touchscreen Controller Display Interface Description
★ Home Page
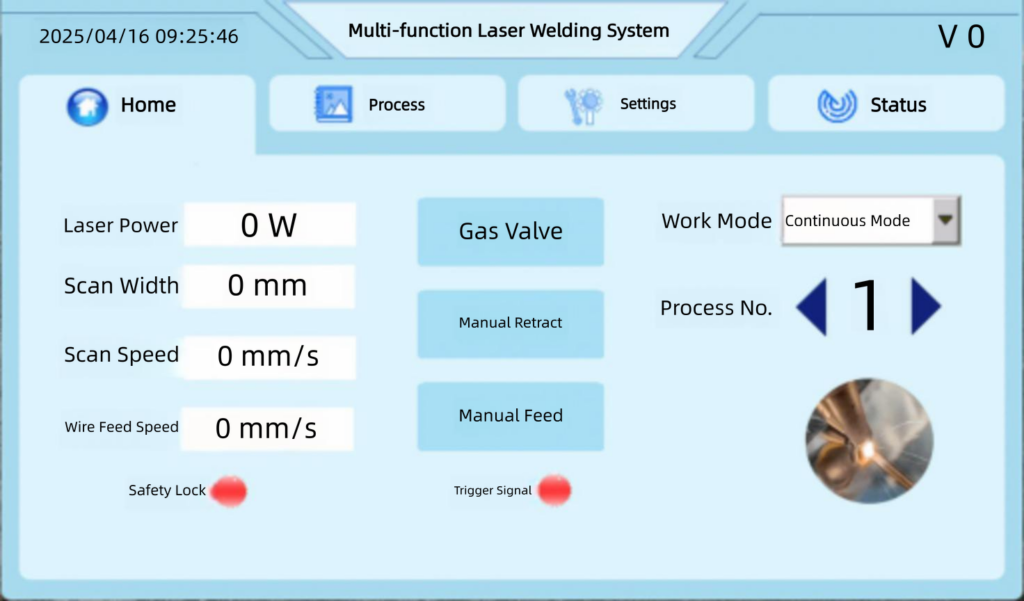
The home page is the main working page, and all the system’s contents are displayed or accessed from this page. The main displayed content includes:
(1) System Name: This indicates the name of the system (as shown in the figure: Multi-functional Laser Welding System). This name can be customized before purchase.
(2) Version Number: The version number indicates the version of the internal program of the touchscreen (as shown in the upper right corner of the figure).
(3) Laser power: The power is set according to the required wattage. Before setting, the total power wattage of the laser needs to be set in the settings interface.
(4) Spot width: The swing width of the galvanometer mirror;
(5) Mirror speed: The oscillation speed of the mirror;
(6) Spot width: This refers to the size of the light spot formed when the red light and laser pass through the welding joint.
(7) Wire feeding speed: Wire feeding speed of the wire feeding machine;
(8) Process Sequence Number: The controller supports the configuration of multiple sets of process parameters. You can switch the process by using the < > buttons on the touch screen.
(9) Working mode: There are 5 modes to choose from, namely continuous mode, fish-scale mode, single-point welding mode, cutting mode, and cleaning mode.
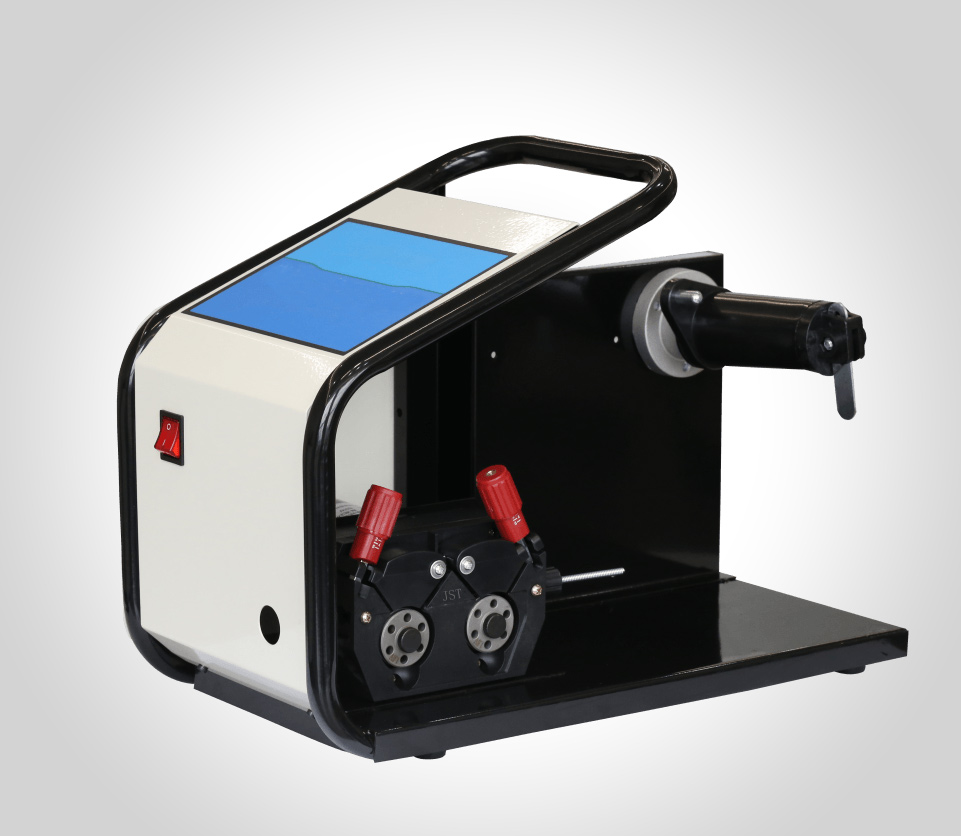
(10) Wire feeding speed, wire feeding switch, manual wire retraction: This function is a dedicated feature for the wire feeder.
(11) Mirrored switch: This is the switch for enabling and disabling the spot mode.
(12) Valve Switch: Manually activate the test switch for opening and closing the gas valve. During operation, the gas output is not affected by the switch.
(13) Laser Enablement: Manually switch on and off the laser enablement switch. It is automatically enabled during operation.
(14) Safety Lock: When in normal conduct, it shows green; when turned off or not connected, it shows red.
(15) Trigger signal: When the trigger is not pressed, it shows red; when pressed but not connected, it shows red; when connected normally, it shows green.
(16) Overcurrent Alarm: Abnormality in the conveyor control circuit is indicated by red, while normal operation is shown in green.
★Process
The process page is the page for setting process parameters. This page is divided into two sections, and you can enter the second interface by clicking the “Next” button at the bottom right corner of the home page.
(Laser frequency): The number of times the signal goes from a high level to a low level and then back to a high level per second;
(2) Duty Cycle: The proportion of the high level within a pulse cycle throughout the entire cycle;
(3) Mirror speed: This refers to the number of times the mirror motor vibrates per second;
(4) Early gas supply and delayed gas cut-off: Early gas supply refers to the situation where the gas valve is opened earlier during the operation; delayed gas cut-off refers to the scenario where the gas valve is disconnected later after the welding process is completed.
(5) Ramp-up time and ramp-up power: The ramp-up time refers to the duration during which the duty cycle and laser power of the laser increase from 0% to the set value after the trigger signal is activated. If a ramp-up power setting is made, it refers to the time taken from the start of the ramp-up to the set power value.
(6) Slow-down time and slow-down power: The slow-down time refers to the duration it takes for the duty cycle and laser power of the laser to decrease from the set value to 0% after the stop working signal is received. If the end power of slow-down is set, it refers to the time it takes for the laser power to decrease from the set power value to the end slow-down power.
(7) Delayed Light Cut-off: Set the delay time for light cut-off. After the trigger of the laser welding gun is released, and after the preset duration of continuous light emission, the light will stop. This can effectively prevent wire breakage. It is recommended to set the time to 200ms.
★ Settings
The setup page only requires setting the maximum power value of the laser and adjusting the function of the galvanometer mirror.